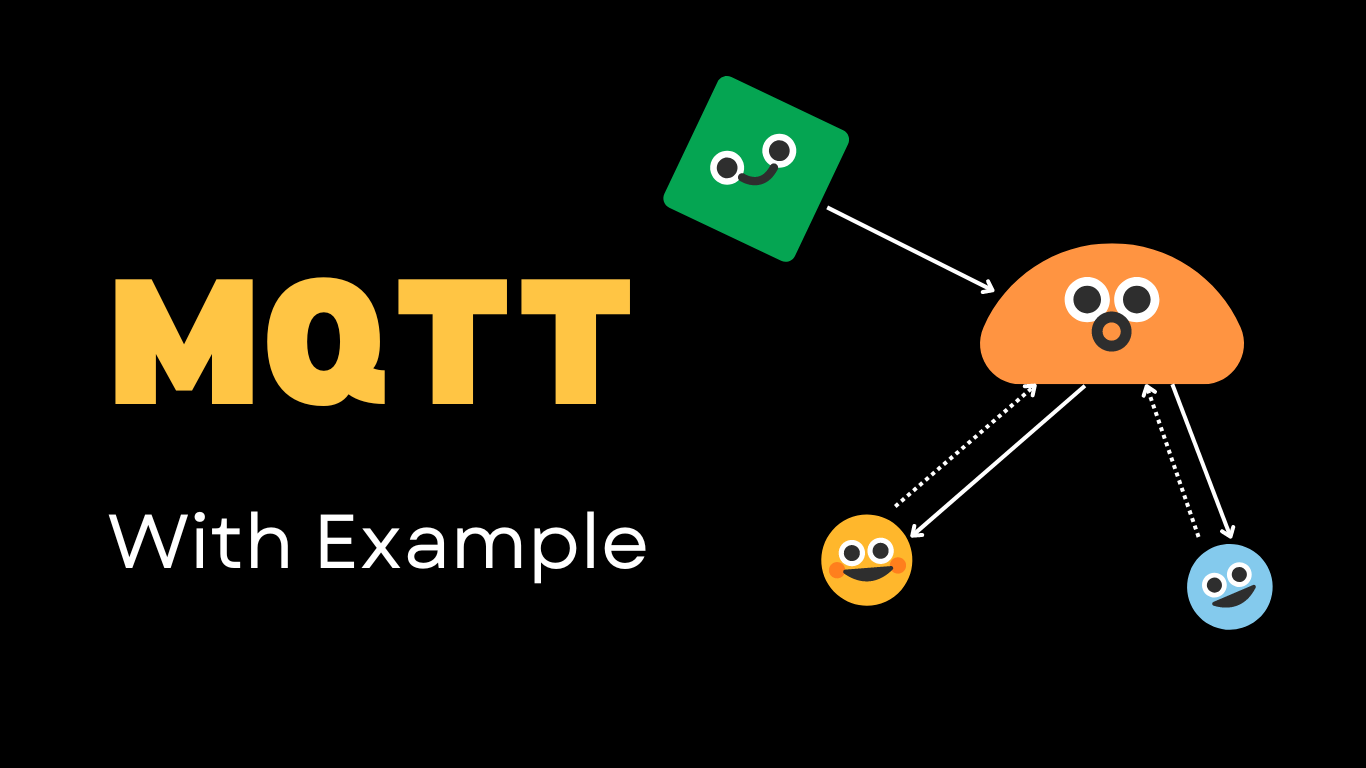
MQTT with example
Posted on February 19, 2023 • 3 minutes • 631 words
What is MQTT ?
MQTT : Message Queue Telemetry Transport
- It is a standard messaging protocal for IoT(Internet of Things) sector.
- This was especially built for Machine-To-Machine(M2M) communication.
- It is a simple, lightwieght but effective way to transport messages across a lot of devices with minimal bandwidth using publisher/subscriber model.
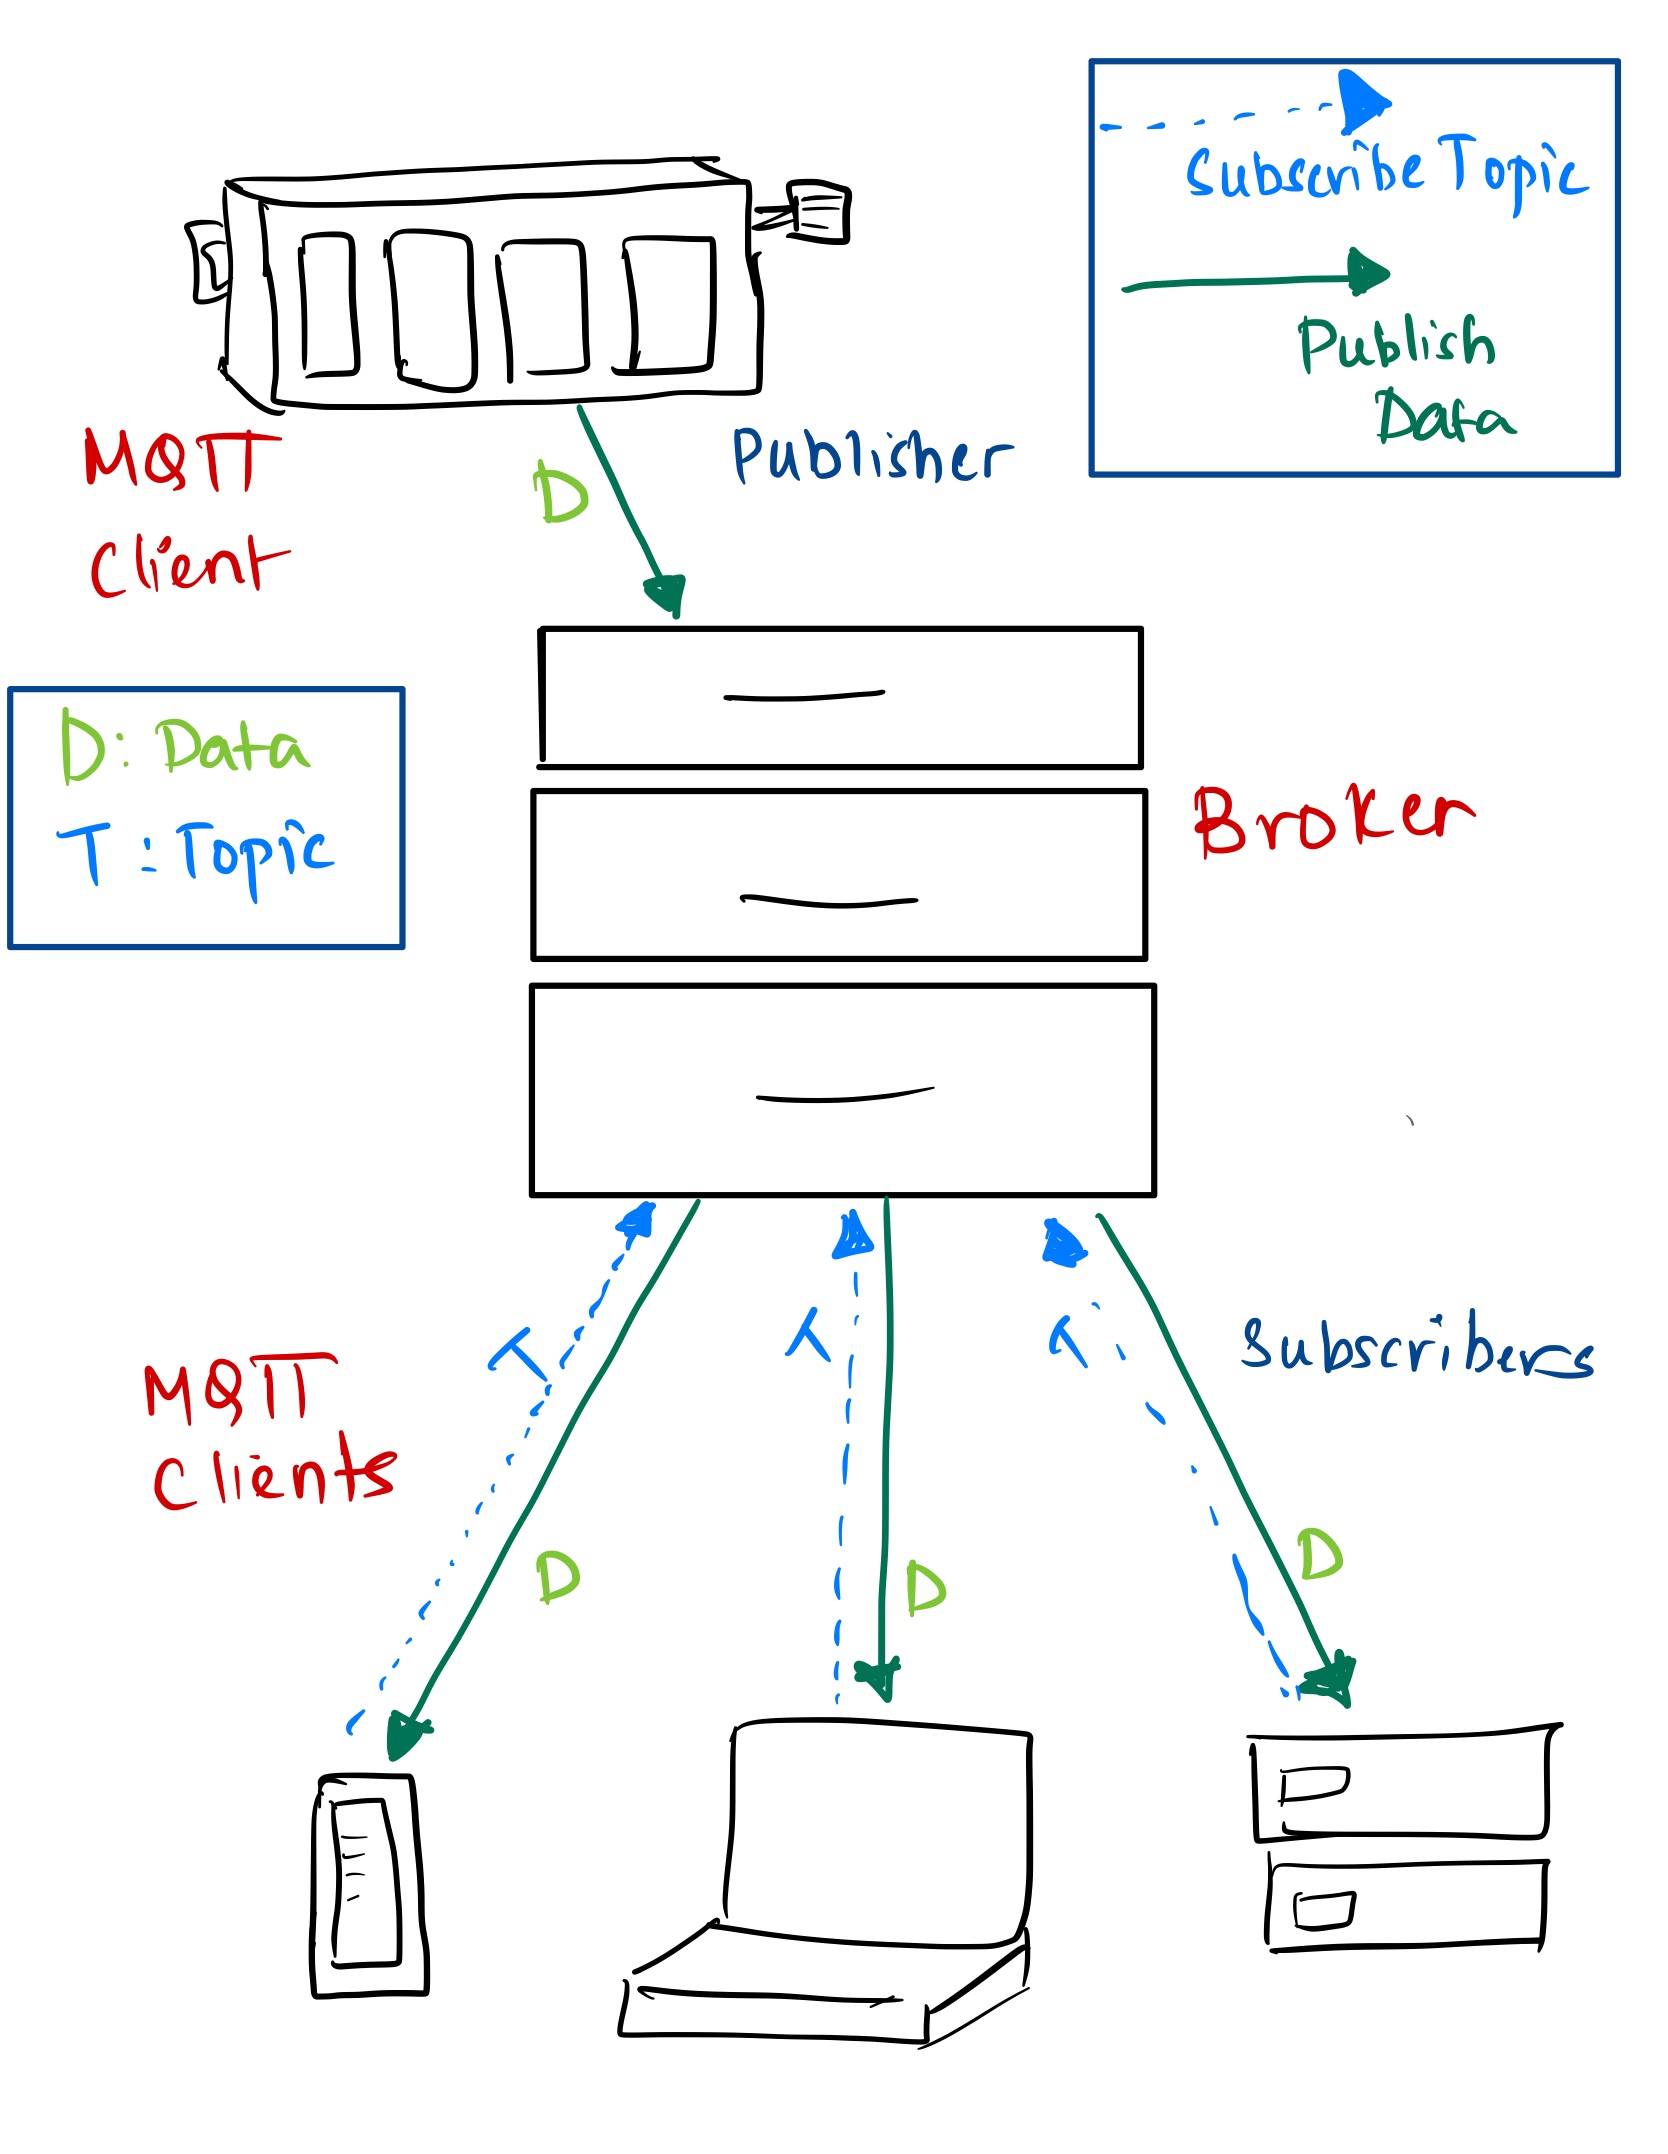
Components of MQTT:
-
MQTT Broker/Server: It is server which routes published data to the subscriber who subscribed to that topic.
-
MQTT Clients: The devices which transport data/messages via broker and act as publisher or subscriber.
-
Topic: This is the special channel/tunnel to pass the messages between a Publisher and its Subscriber.
-
QoS (Quality of Service): This parameter is to ensure the reliability of the message sent in between Publisher and Subscriber. There are 3 values of this:
- Qos=0 -> at most once
- Qos=1 -> at least once
- Qos=2 -> exactly once
Why MQTT ?
-
Lightweight but Effective: Small devices like a temperature sensor or motion sensor can use this for transmitting their data with minimal network bandwidth and resource utility.
-
BiDirectional Communitcation with Multiple Devices: MQTT uses publisher-subscriber model which makes it easy to send messages to group of devices at the same time and vise versa.
-
Reliable Message Delivery: The reliability of message delivery can be controlled by the QoS parameter given by MQTT.
Example in Python:
This is the most basic example to see how the whole publisher-subscriber model works with a broker in between.
Note: There are many tools and libraries available for building Pub/Sub clients. Also, there are a lot of open source Brokers avaiable as listed in this: https://mqtt.org/software .
Code GitHub link :
https://github.com/neetaBirajdar/mqtt_project
Steps:
- Create Publisher and Subscriber
- Run the Broker
- Subscribe to the topic via broker
- Publish on the same topic via broker
- Check the message recieved by Subscriber which is sent by Publisher

MQTT Client and Broker used here:
- MQTT Clients => Paho Client (https://github.com/eclipse/paho.mqtt.python )
- MQTT Broker => Mosquitto (https://mosquitto.org )
Installation of the softwares required:
a. Install paho:
pip install paho-mqtt
b. Install mosquitto:
Install as per OS on the machine you are using with the options given here : https://mosquitto.org/download/
c. Define configuration:
Define the baisc configuration to establish connection and send/recieve the data.
# Add to config.py

HOSTNAME="localhost"
PORT=1883
TOPIC="test/topic"
Note: You can give any Topic name instead of test/topic but make sure you have the same port and hostname if you are running this locally.
d. Create Publisher:
This pubslisher is created using the method publish inside paho.mqtt. It takes the basic configuration which we defined before. Also, here we are publishing the message : “test_message”(you can give any message).
# Add to mqtt_publisher.py

import paho.mqtt.publish as publish
from config import TOPIC, HOSTNAME, PORT

publish.single(
                topic=TOPIC,
                hostname=HOSTNAME,
                port=PORT,
                payload="test_message"
              )
e. Create Subscriber:
Similarly, use subscribe from paho.mqtt to create a basic subcriber who is listening to the defined configuration.client_id can be anything as you are on your local machine.
Important: Subscription to a correct topic is necessary to get the expected data.
# Add to mqtt_subscriber.py

import paho.mqtt.subscribe as susbcribe
from config import TOPIC, HOSTNAME, PORT

message  = susbcribe.simple(
                            topics=TOPIC,
                            hostname=HOSTNAME,
                            port=PORT,
                            client_id="test_client",
                            qos=0
                        )

print(f"\nTopic: {message.topic}")
print(f"\nMessage: {message.payload}")
f. Run these in multiple terminals:
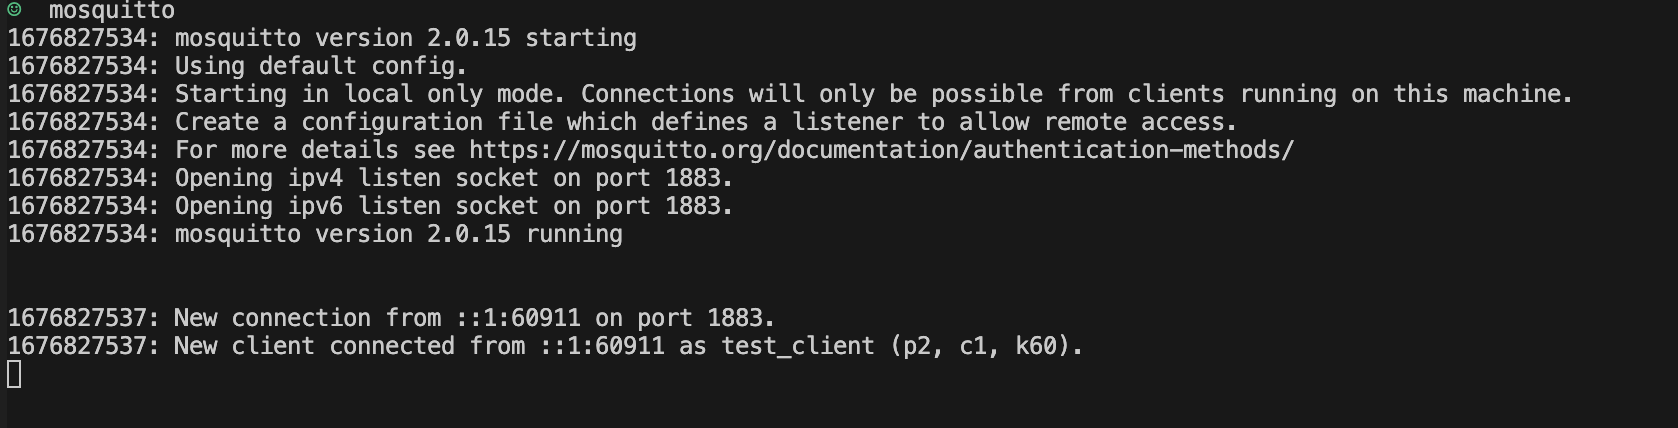
- First terminal-> Run your Broker using :
mosquitto
It should look like this :

- Second terminal -> Run your subscriber using python:
python mqtt_subscriber.py
Once you do this, you will see the test_client connection is established with Broker within first terminal as shown below:
- Third terminal -> Run the publisher and publish the data:
python mqtt_publisher.py
On first terminal, you will see a new connection:
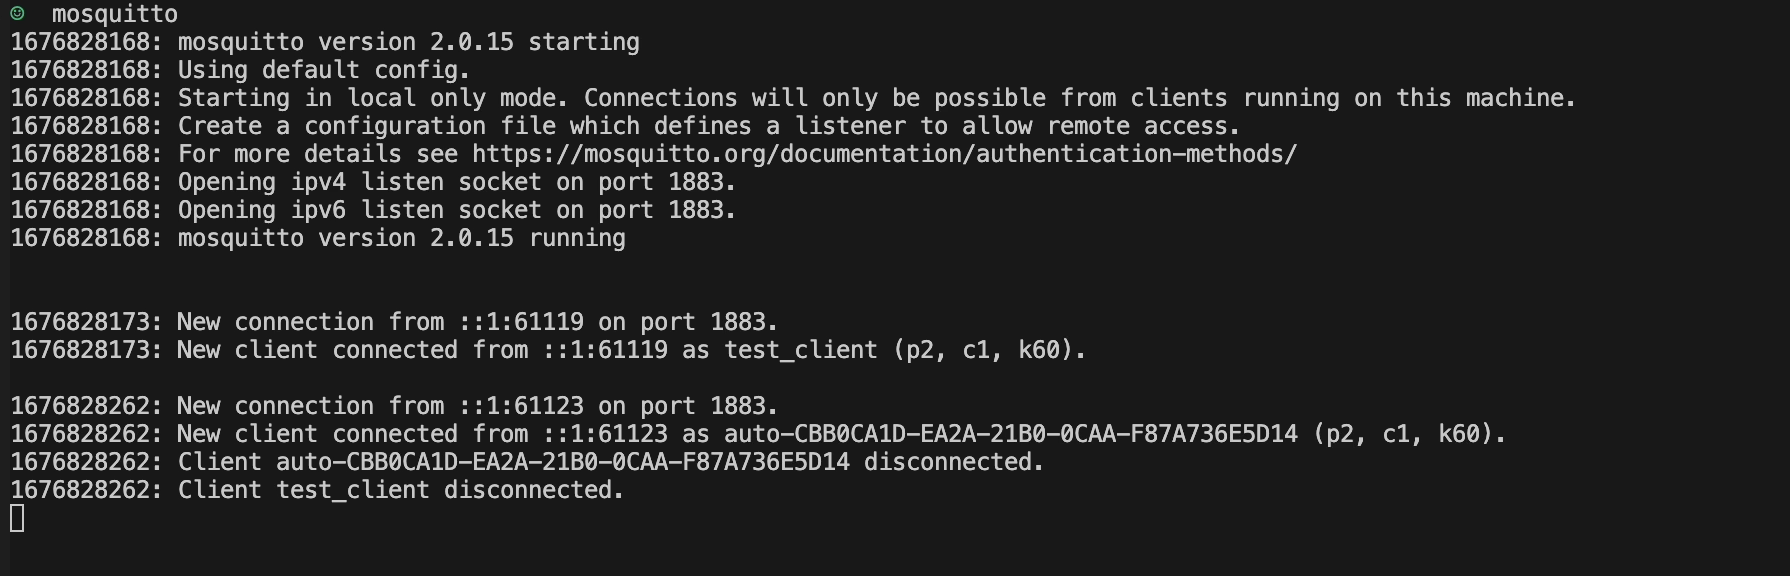
And on second terminal, you will see the data published by the publisher which we ran using python:

Finally, the loop is completed.
Congratulation !!
You have create an end-to-end flow for Publisher-Subscriber model via Broker.